Keeping your vape tank clean is essential for a satisfying experience. Vape tanks can accumulate residue and flavors over time. This can affect the quality of your vapor and the taste of your e-liquid. Proper maintenance is key to enjoying optimal use.
Knowing how to clean a refillable vape tank properly can help enhance your vaping sessions. Regular cleaning can remove old flavors and prevent gunk buildup. A clean tank ensures you get the best flavors from your current e-liquid. It can also extend the life of your tank and its components.
Cleaning your vape tank may seem daunting, but it’s a manageable task. You need basic supplies and some techniques. It’s important to remember that not cleaning your tank can lead to poor performance. Vaping should be enjoyable, so take a few moments to maintain your equipment. A clean tank leads to a better vaping experience.
Understanding the components of a refillable vape tank is crucial for maintaining optimal performance. A typical vape tank consists of several key parts: the tank, coil, mouthpiece, and airflow control. Each component plays a significant role in producing vapor and delivering flavor.
The tank holds the e-liquid. Clear tanks allow you to monitor the e-liquid level. Coils heat the liquid to create vapor. Regularly replacing coils enhances flavor and prevents burnt hits. The mouthpiece is where you inhale, and varying designs can affect comfort. Airflow control lets you adjust the draw resistance and vapor production, making it essential for a personalized experience.
Tips: Regularly check for leaks around seals. Clean the tank with warm water and let it air dry. This prevents residue buildup. Consider soaking parts in a vinegar solution for stubborn grime. Lastly, monitor e-liquid levels to avoid dry hits. An often-overlooked detail: cleaning each part thoroughly can lead to a better vaping experience. It's easy to dismiss maintenance, but neglect can dull your flavors.
| Component | Description | Cleaning Method | Recommended Frequency |
|---|---|---|---|
| Tank Body | Holds the e-liquid and provides structure. | Rinse with warm water or soak in a vinegar solution. | Weekly |
| Coil | Heats the e-liquid to create vapor. | Replace when burnt flavor is noticed. | Every 1-2 weeks |
| Mouthpiece | The part through which the user inhales vapor. | Wash with soap and water or alcohol wipes. | After every refill |
| Airflow Control | Regulates the amount of air that mixes with the vapor. | Wipe with a damp cloth. | Monthly |
| O-Rings | Seals to prevent leaks. | Inspect for wear and replace if damaged. | Every 1-2 months |
: A typical vape tank includes the tank, coil, mouthpiece, and airflow control. Each part is essential for performance.
Regular coil replacement enhances flavor and prevents burnt hits. Neglecting this can dull your overall vaping experience.
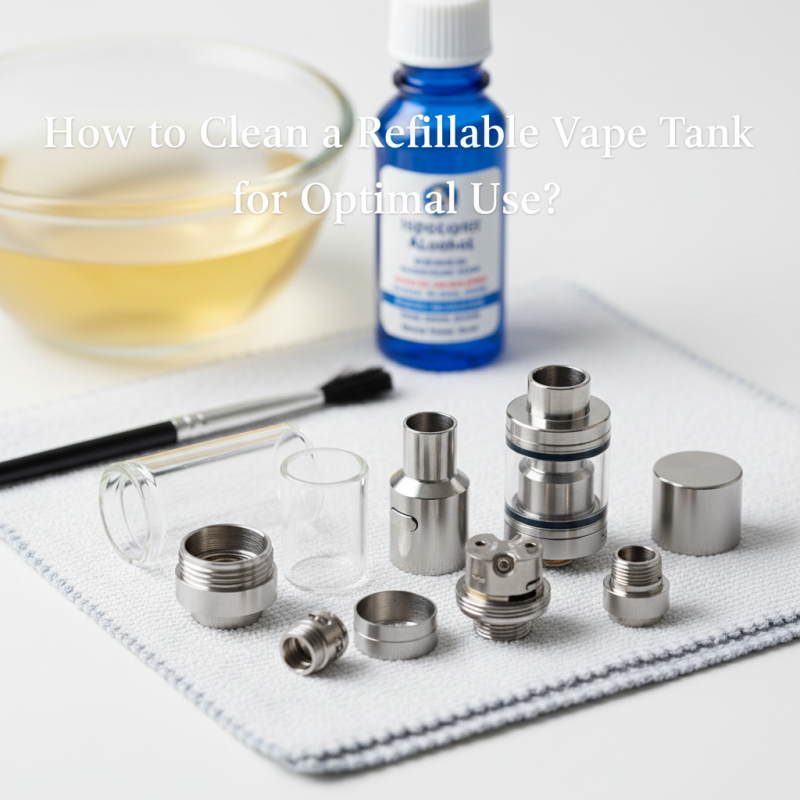
Use warm water, isopropyl alcohol, cotton swabs, and a soft cloth. These tools help remove residue effectively.
Neglect can lead to buildup, resulting in leaks or burnt tastes. It's crucial to maintain a clean tank for better flavor.
Regular checks for leaks are essential. An overlooked leak can quickly damage the device and affect performance.
Mouthpiece design varies. It can impact how comfortable inhalation feels. Testing different designs can improve your experience.
Reflect on your cleaning routine and adjust techniques. Frequent changes in methods may enhance your overall vaping experience.
Adjusting airflow affects draw resistance and vapor production. Finding the right setting personalizes your vaping experience significantly.
Moisture can interfere with e-liquid when reassembling. Ensuring parts are completely dry prevents potential issues.
Soaking parts in a vinegar solution can help lift stubborn grime. This method may take more time, but it's often necessary.
Cleaning a refillable vape tank is essential for optimal performance and longevity. To understand how to clean a refillable vape tank properly, you first need to familiarize yourself with its components, such as the tank, coil, and mouthpiece. Essential tools for this process include warm water, a small brush, and a microfiber cloth.
The cleaning process begins with carefully disassembling the vape tank, ensuring all parts are separated. Once disassembled, effective cleaning techniques, such as rinsing components and using a brush for stubborn residue, can be applied. After cleaning, reassemble the tank, making sure to check for any leaks during testing. Regular maintenance and cleaning of your vape tank not only enhance flavor and vapor production but also contribute to a better overall vaping experience.